Homekit Secure KeyPad
First KeyPad to allow You secure access to Your homekit accessories and scenes.
Now You can use PIN codes for automation running like comming home or door opening.
Thanks to OTP, you can provide access to a cleaner or postman:)
How


This is homekit enabled device that creates 2 Sensors to automate scenes.
For example if
good PIN is entered run automation that open homekit-lock or disarm alarm or
both 😊
You can
create another for wrong pin entered for example “Push” notification or make
snap from camera mounted on front door.
You don’t
need to use Your phone APP to secure run automation from outside of Your Home. It can be mounted on froont door for example

Why it’s Secure
Because everybody can have access to it or even still it, I focus to protect code and PIN’s. So similar to password database all pins are HASH with SHA256 function and salted with random seed.
Even if someone get Your device it’s very vary hard to recover PIN’s.
What for:
To store 8 PIN’s (max 10 digits each) for all Your family
To store one OTP (One Time Passcode)
To get OTP easy direct from You phone (need Eve APP)
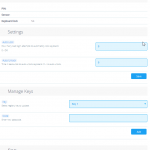
For easy management with webPanel
For FUN or to create electro-lock (with my other firmware coming soon) for fridge and FOOD supervised access management 😊
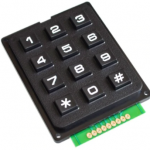
Now it’s working with Matrix Keyboard 4×4 becouse i only have that one, already order 4×3 as shown in the gallery so i’ll update firmware soon.
Now 4×4 keyPad working only with first 3 columns.
How it works:
After successful flashing and home pairing open EVE application and allow access to webPanel.
Go to http://[KEYPAD_IP]:88/panel
And add Your secret keys.
On key pad enter PIN and click “#” (3-col 4-row), system will check if You enter correct PIN and trigger right sensor.
If You want to get OTP code got to EVE app and run option “Get OTP”. Code will be displayed in EVE App on OTP characteristic.
OTP after first use will be deleted from memory.
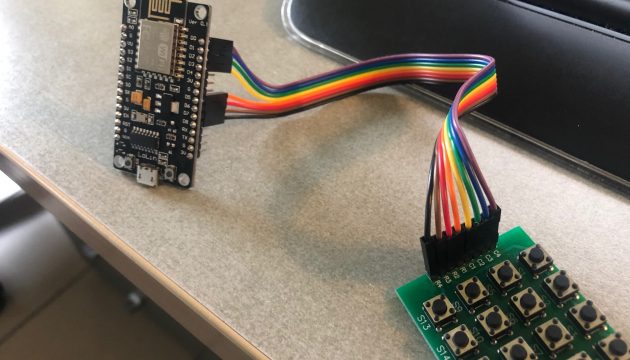
WIRING
On wemso D1 mini or nodeMCU use:
C1 = D3
C2 = D2
C3 = D1
C4 = D0
R1 = D5
R2 = D6
R3 = D7
R4 = D8
On other boards like Arduino:
C1 = GPIO0
C2 = GPIO4
C3 = GPIO5
C4 = GPIO16
R1 = GPIO14
R2 = GPIO12
R3 = GPIO13
R4 = GPIO15


I found the download in a download folder with all other files. I successfully flashed and added to HomeKit. I enabled WebPanel in the Eve app. However, I cannot access http://[KEYPAD_IP]:88/panel
Hi Peter,
Maybe try other port 80 or 8080
When I try to download the firmware for the keypad, your web server gives me an error of “invalid file type” is there any chance that you could fix this?
I have the same problem and cannot download the file
I searched on ebay and found most if not all of these keypads do not have any labels on C and R on the pins. Do they have a “standard” pin assignment? If so, what would that be?
I think it’s depends on software. You can use it for any purpose. As numerical keypad or anu other buttons group.
Hi! I’m using this keypad https://learn.adafruit.com/assets/89978 and have wired via your instructions above, except for the C4 connection (mine doesn’t have a 4th column).
I’m able to get it to connect to homekit, and am able to access the panel, but only the number 3 is working, which makes me think I’m wiring things incorrectly somehow. Any recommendations? Does this support 3×4 matrix?
Hi Pete, it should work.
can You post a wiring picture i’ll check.
Hi, I really like this! Can one use multiple Keypad devices in one HomeKit system? I just flashed a second ESP and it works ok in WiFi, I just cannot pair it to the HomeKit system.
Hi Oliver, Yes You can have as many as You want.
To pair it use code on post http://dziky.pl/howto/paring-dziky-accessories/
Using the same HomeKit code (11111111), it allows me to register the 2nd device if I disable the 1st but afterwards both don’t work…
If I don’t disable the 1st I cannot register the 2nd because it says its already registered… somehow the 2 devices are not seen as different ones by HomeKit.
If I unplug one the other works.
It’s maybe a Bug in mdns names.i need to debug this
I just saw the 2 devices also have the same serial number…
Try now, i just update code,
The file has zero bytes…
Hi, can you pls re-upload? The file is empty!
Hi, Sorry somethig went wrong. I post working BIN
I got it installed. I can add 2 devices to HomeKit and assign Automations, but they don’t get executed even though I can see the sensors trigger…
Did You set it up? Did You wire them correct? and last after putting code You need to push “#” on keyboard
Yes, it triggers the event correctly but the automation doesn’t start, strange…
If You want to make automation working with smart locks etc You have to convert it to shortcut. becouse of security apple don;t allow for example open lock from automations